
Well, in the spring of 2012 I was getting very disheartened with Modelrailforum.com where I was a moderator. The problem for me was that there was simply too much talking and precious little modelling going on.
In a last ditch effort I suggested a group build project. I like to consider it a success. At least 1 wagon was built by someone who had never touched a brass kit before and for a first go he made a good job of it!
The sale of the forum to an IT firm was really the final catalyst in me leaving. I wanted to get on with some proper modelling and spend less time on a forum that was heading in a direction that I didn’t want to go.
But here is The build log of that humble wagon that was the subject of the group build.
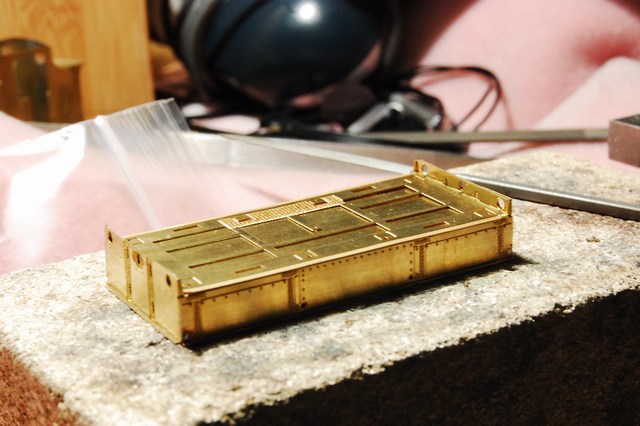
The wagon chosen was a GWR Diagram P4 Ballast wagon. The kit was from Bill Bedford.
If you take your time, the wagon will go together well and is a good introduction to modelling something a bit finer than a plastic kit.
Its not an easy model. But will throw up many of the techniques that will be invaluable in tackellling other brass kits such as overlays, compensation, painting and so on…
Here is a shopping list of things that you will require to complete the kit.
The wagon itself from Mousa models.
The instructions are available for download here
The solder I recommend is DCC concepts 145’ Detail solder and its accompanying No-clean flux. Their website is here.
The decals I used for this build are from HMRS. Sheet 11
Waterslide decals are also available from Fox Transfers
The Iron I recommend is the Antex XS25. There is an option for a better quality Silicone cable. This is well worth the extra couple of pounds it costs. Its available from Amazon here
Paint
I almost exclusively use Phoenix precision paints.
For this wagon the correct grey is P19
With the PQ9 thinner to go with it.
Ant the PQ1 Etching primer
If you prefer Railmatch make acrylics that are water soluble. I haven’t use them yet so I cant vouch for the quality but they are there if you want them.
The wheels I used are the 3’1” from ultrascale.
This was the first time I had used their wheels and I was stunned at the quality. They are so much nicer than anything else I had ever used. They are not cheap, But when you think of the amount of time you will spend building a model, An extra couple of pounds is really insignificant.
Its worth noting that Ultrascale have a very long lead time on their products.
Construction of the model is reasonably straightforward.
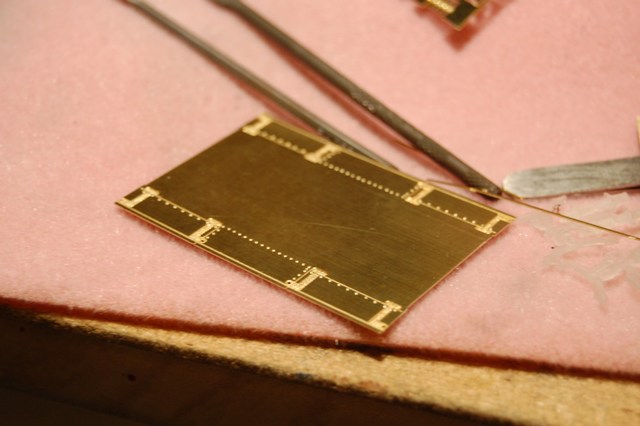
The first step is to cut out the main body part. This is easy enough to do with a pair of scissors.
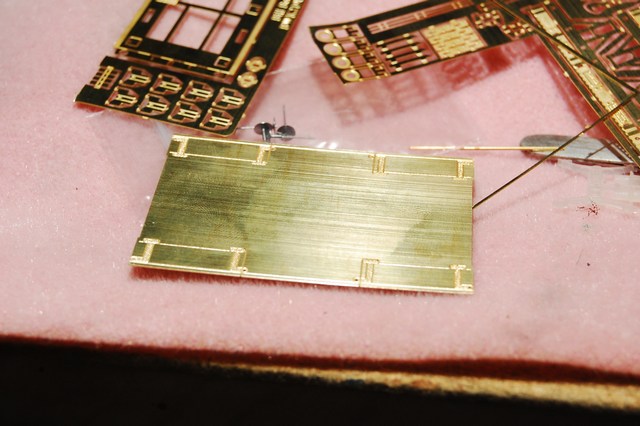
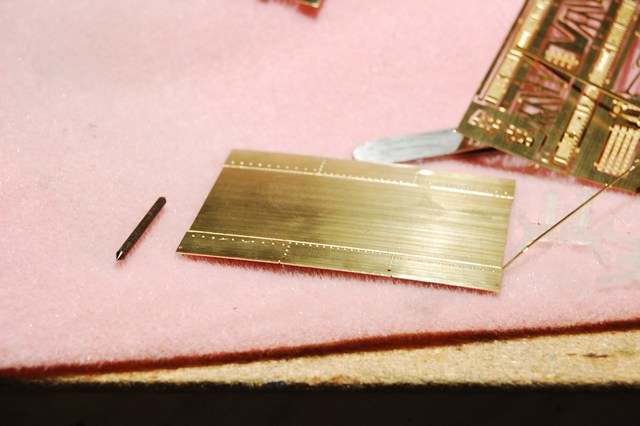
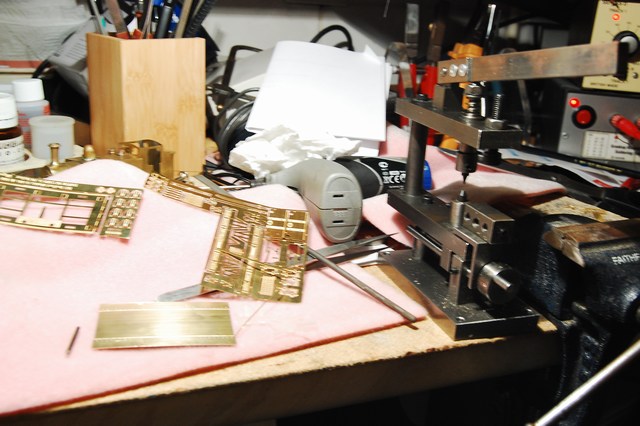
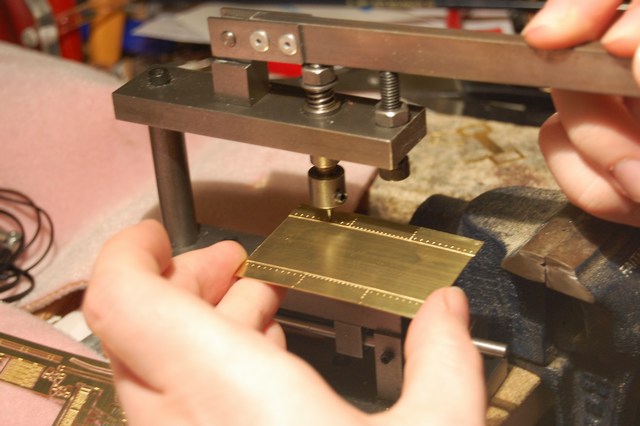
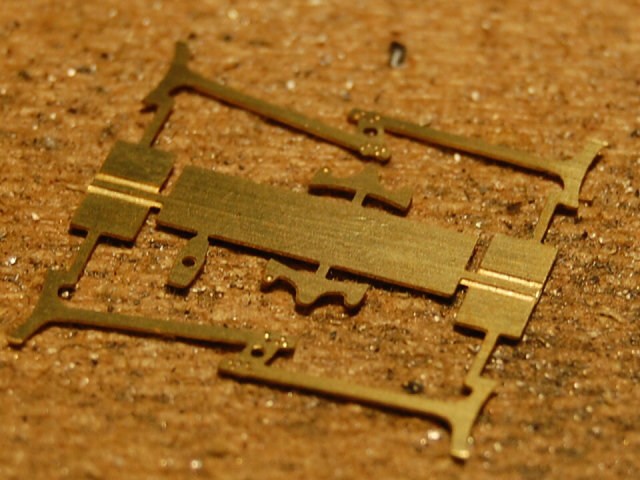
Punching out the rivets comes next. In fact you may wish to do this before removing any of the parts from the etch.
There are a number of ways to do this. But the results will all be the same. I am very fortunate to have a GW model rivet press, but a small blunt nail with a head about .4mm across would have done the job just as well.

Next comes the task of folding the fine ridge along the top of the sides. It’s very thin indeed and needs to be carefully held in a Vice or folding tool. I had a go on a hold and fold tool during the course of this build and frankly, I found it a pain in the neck to use. A vice is just as good for the job.
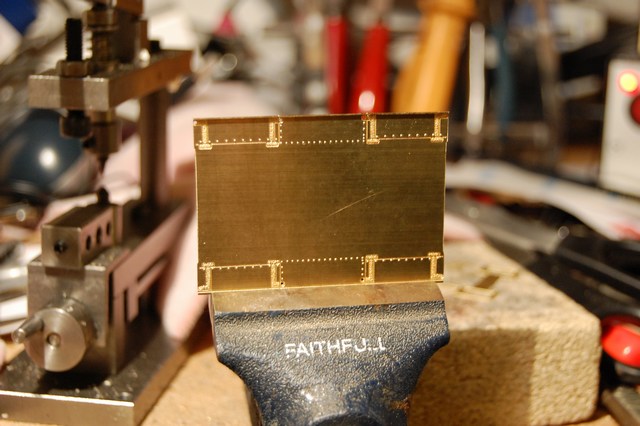
Soldering in the ends is easy enough. Just offer up the parts, place a drop of flux in the right place and place a small ~3mm piece of solder next to the joint, apply heat and the solder should flow nicely into the joint. Very little cleanup should be required.
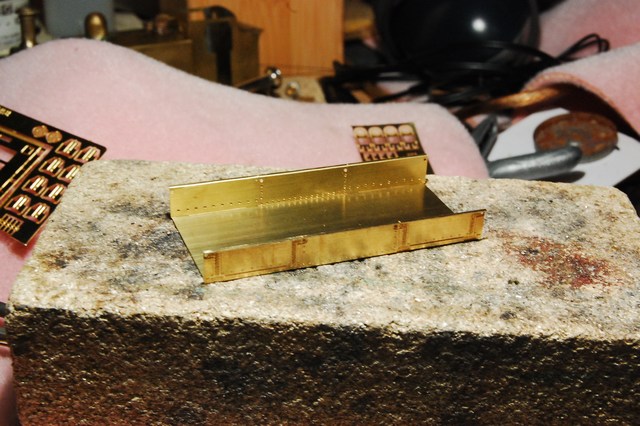
Once that’s done, you can offer up the sub floor. On my kit it was a little tight. Just grace the edges with a Swiss file and it shouldn’t be a problem.
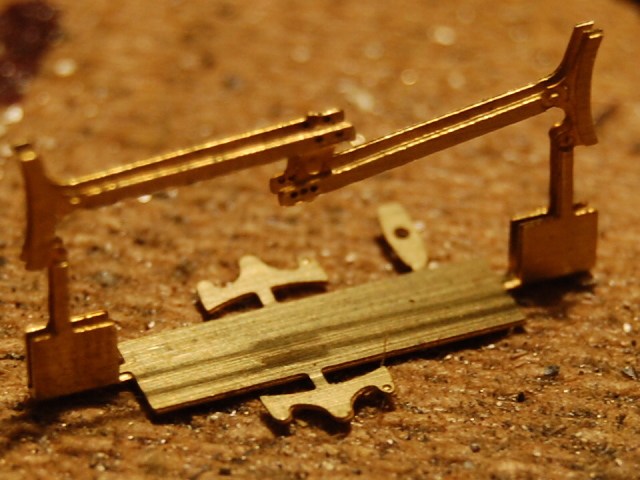
Folding up the solebars and W hangers was easy enough.
BUT BE AWARE THAT THEY ARE HANDED
The brakes are only on one side of the model! I soldered mine on the wrong side and felt like a complete tit afterwards!
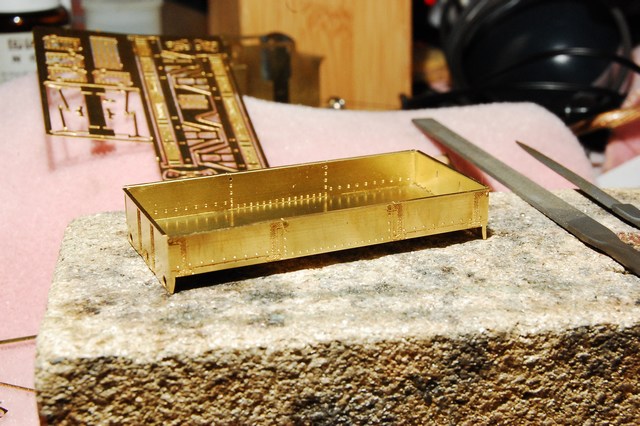
This is about the stage that I left the forum so I neglected to take many more construction pictures for the remainder of the build but the ones I did take are presented here.
The brake pads need laminating together which looks difficult at first but is actually very simple. Just clamp the 3 layers together and flood them with flux. touch the end with a soldering iron with a little solder on the end and the flux should draw the solder into the joint. once its cooled, just tidy it up with a Swiss file and its done. Use the same process for the central pivot. I am sorry I didn't take any pictures of this. its a simple and effective process. If ever I make another, I will be sure to correct this.
The boor bumpers are very tricky. There are 2 small folds in a very small space which requires a pair of fine nosed pliers.
They can always be left off. But are quite distinctive so its worth spending the effort. I found the best way to add them was to tin the edges with solder. Offer them up to the solebar and then heat gently with the iron. With a drop of flux on the solebar, the whole thing melts together beautifully. By the time I finished the model I was good at it!
I used a similar technique of tinning and sweating for most of the rest of this model. All of the body detail was applied in this manner. Also it’s a good way to finally attach the sub floor. It doesn’t need much, just a tiny bit of solder. Remember, all a model ever does is hold the paint in place. It’s the paint that people actually see.
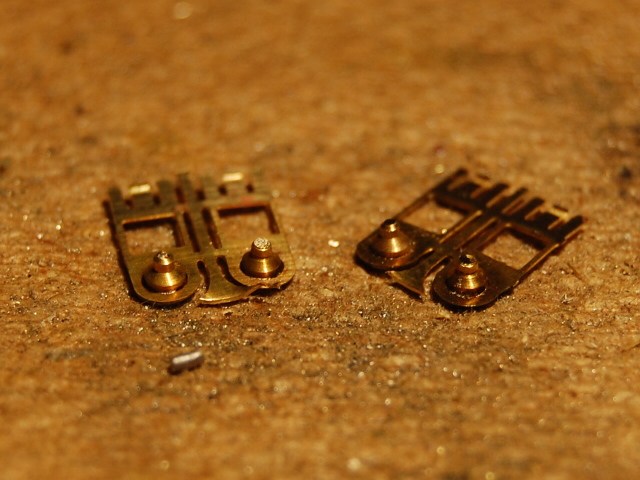
The only other bit that might pose a problem was the bearings. I think its best to work on them when they are still on the fret. Just sweat the bearings into place with the tiniest amount of solder.
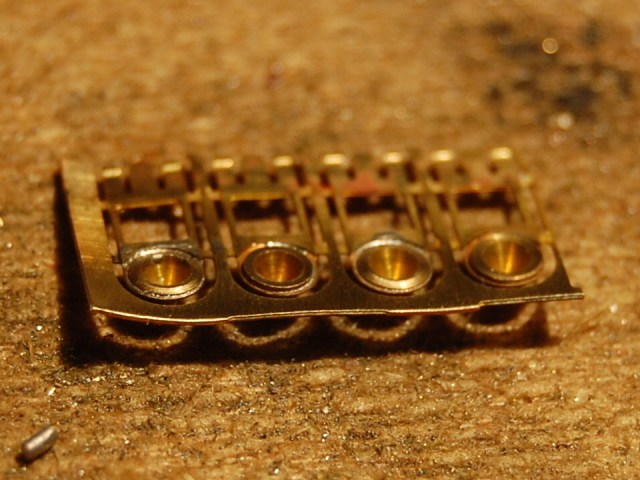
I found it necessary to just kiss the end of the bearings with a file to reduce the height slightly.
The painting process was as follows...
A good clean with a metal cleaner.
A light coat of PQ1 single pack etching primer.
A single coat of GWR P19 wagon grey.
A very light coat of gloss varnish
Decals from HMRS
A very light coat of satin varnish to seal the decals.
Add the buffers
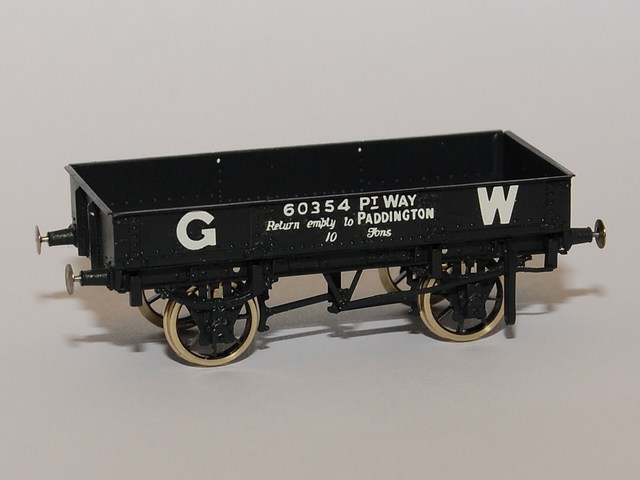
Enjoy the finished wagon!
At some point, I will add the safety chains. but I'm not in any hurry!